CB500 Camshaft Removal
A couple of weeks ago I finally plucked up the courage to open my engine and measure the valve clearances. With new shims in my grubby hands it was time to set about swapping them.
Do not cock this up!
In order to change the valve shims you first need to remove the cam shafts. I read the instructions in the Haynes Manual several times whilst having a builders tea (or 3) and found myself feeling a little anxious.
Let's do this properly
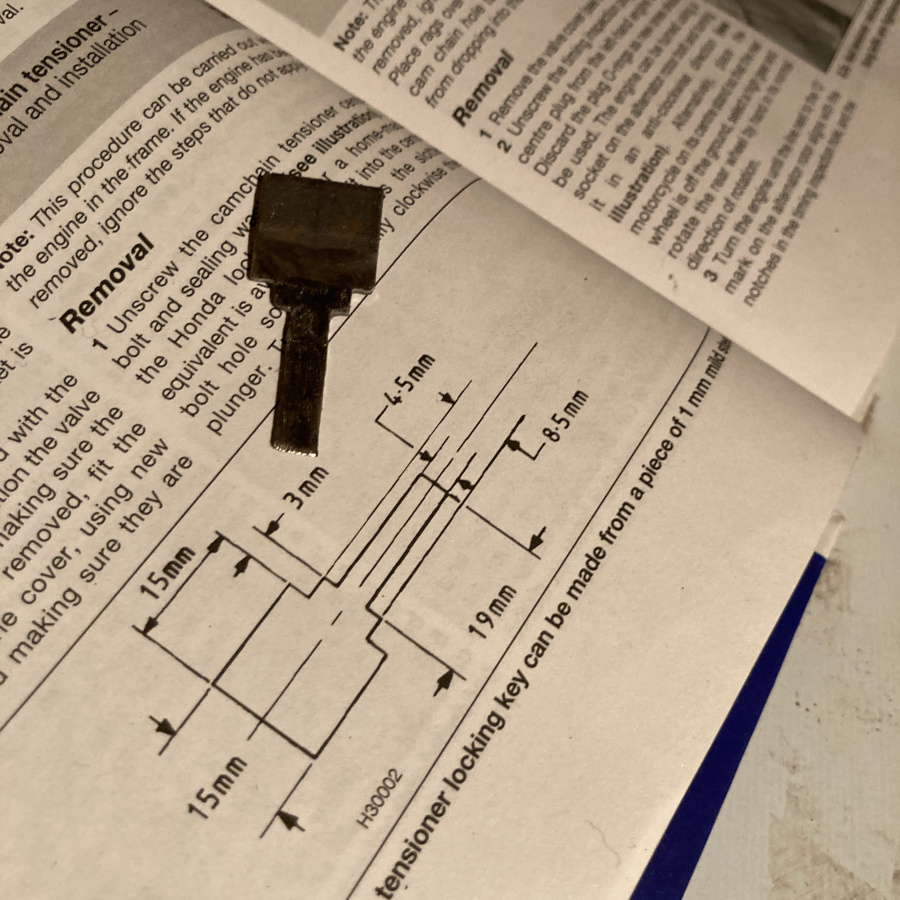
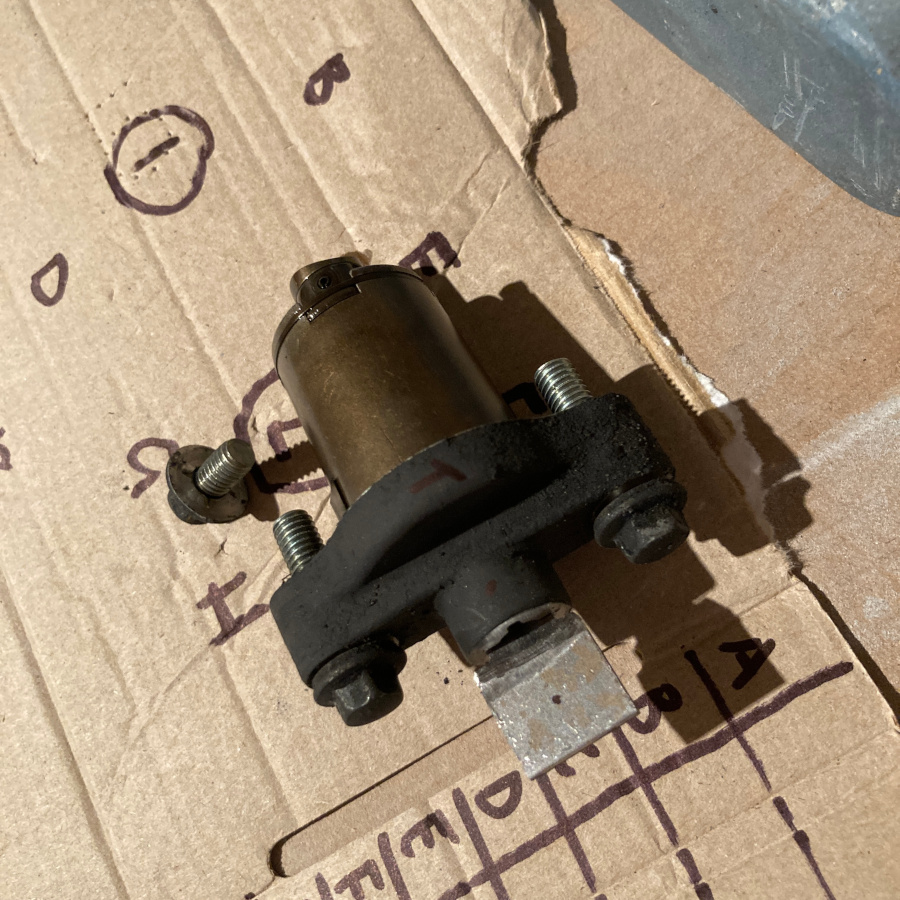
First thing you need to do is to remove the cam chain tensioner. Once again I had to make another order (I should read ahead a little more) for a gasket to replace the old one when it was reattached. To remove the tensioner you need to wind in the tensioner using a Honda tensioner key. I didn't have one but there is a pattern in the manual so I decided to make one rather than the alternative of using a screwdriver.
With the tensioner wound up it was just a couple of bolts to remove and extract.
This may wreck your engine
The next part is easy yet hard. The 2 camshafts each have two cam holders with 4 bolts each. These bolts need to be loosened evenly, if you don't use a criss cross pattern and take your time you can bend a valve or worse damage the cam holders. These cannot just be replaced so a mess up here would mean a whole new upper part of the engine.
With trepidation I worked a criss cross pattern on each cam shaft rather than on each cam holder, quarter turn by quarter turn and with no real need for a fanfare they were loose. You never want to drop anything into the engine especially down into the depths where the cam chain runs and so I had near white knuckles as I moved each bolt very carefully. I only had one thing left to do to expose the valves.
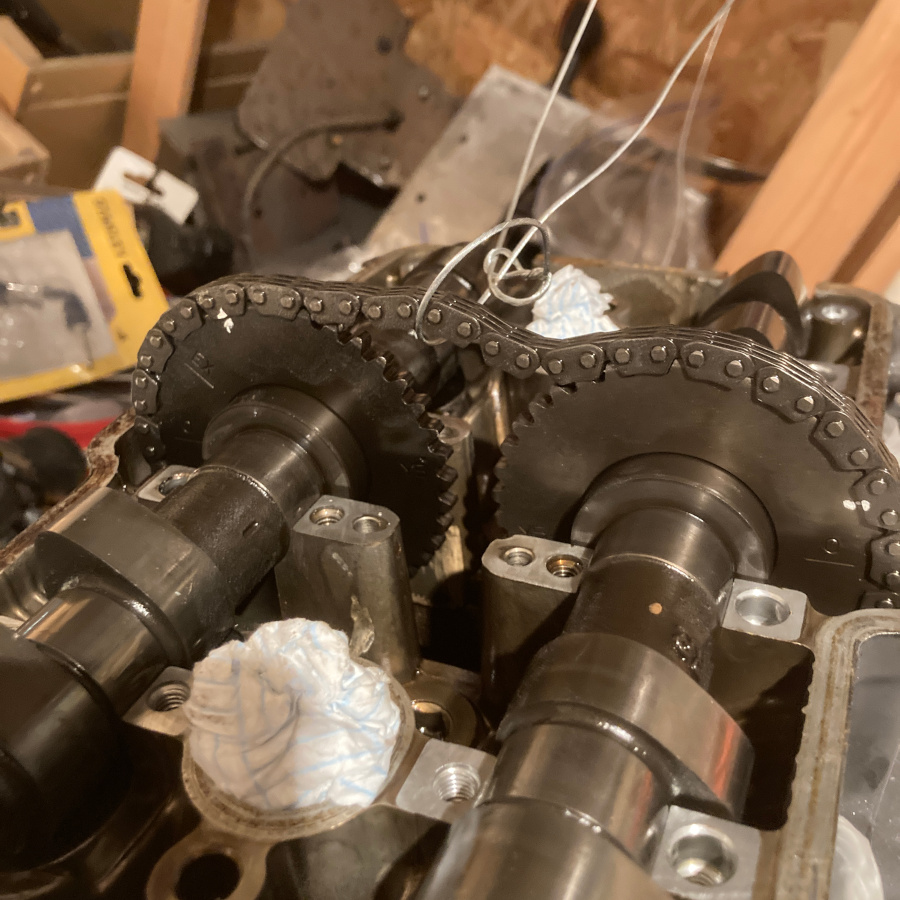
Disengage the cam sprockets from the cam chain
This took me a while to figure out and I am not too excited about doing the reverse later... however, eventually by moving one cam shaft up and forwards I got enough slack in the chain to remove it. I decided at this point to add an extra zip tie as a fail safe to stop the chain falling into the depths of the engine.
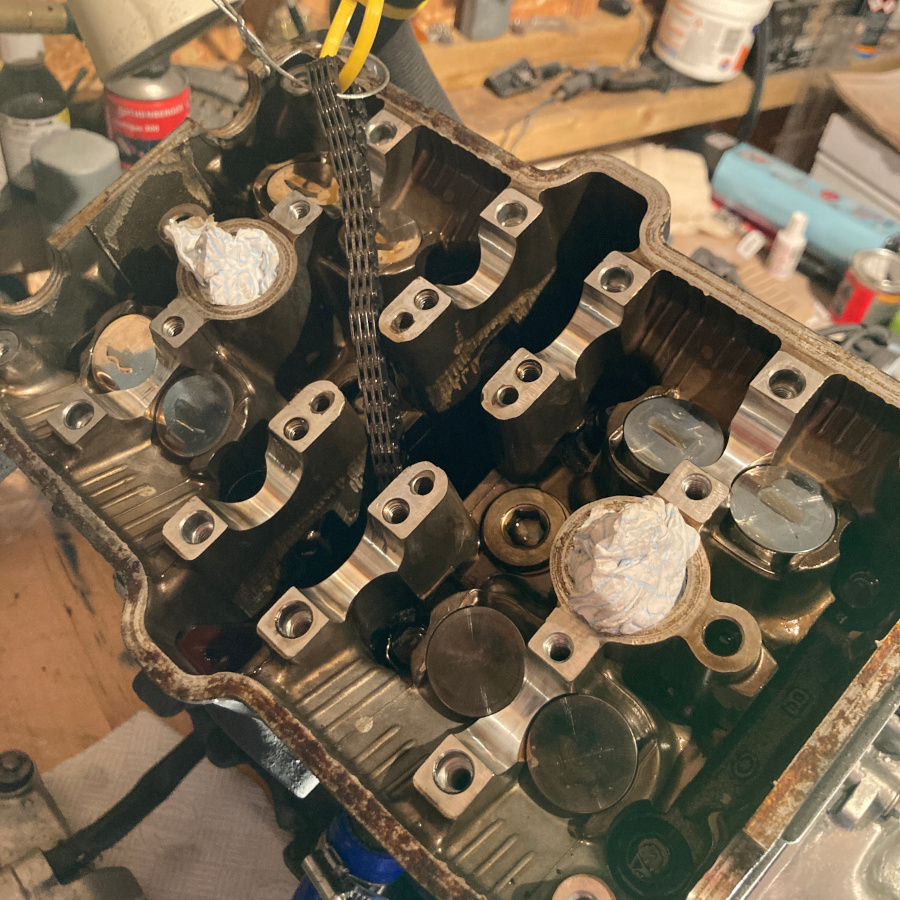
And so here we are... the valve followers are exposed and under each one is a little shim I need to replace. When my molybdenum disulfide grease turns up tomorrow I will be good to try swapping the shims and getting this sucker back together!
Next time... shims, grease and hopefully not TOO much swearing...